Artex stipple is one of the easiest artex patterns to achieve
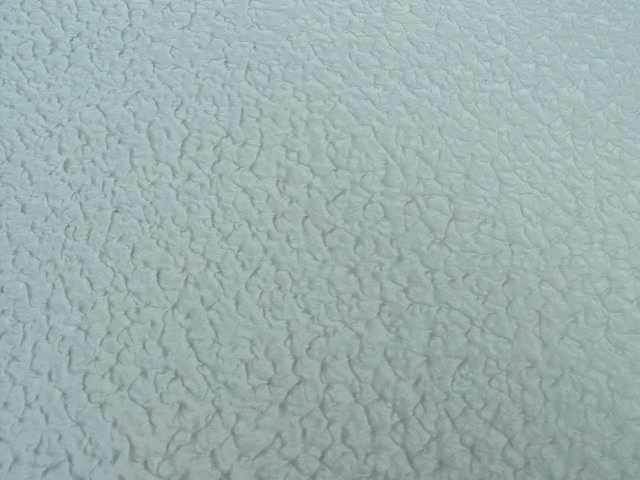
Artex Stipple pattern
Artex can be very messy so overalls and safety glasses are a must!
- To apply Artex to a ceiling or wall it is important to have the room as cool as possible with no draughts, so turn off the radiator and close the windows. The windows can be opened once the Artexing has been finished!
- Bond the whole area with PVA bonding. This will stop the Artex from drying out too fast and give you more time to pattern it.
- When Artexing you do not do too large an area at once or you will never get the pattern before it has started to harden.
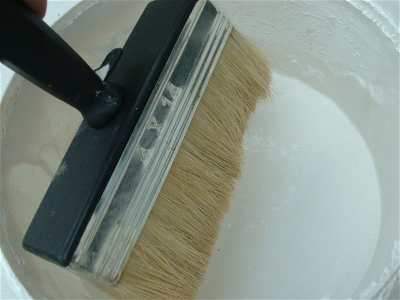
Use a large brush and load it generously with the Artex.
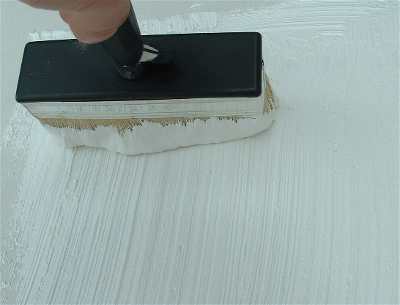
Cover an area of approximately 1metre by half a metre with an applicator brush, ensuring that it is applied generously.

Here you can see that an area has been covered with artex, we are now going to pattern this area.
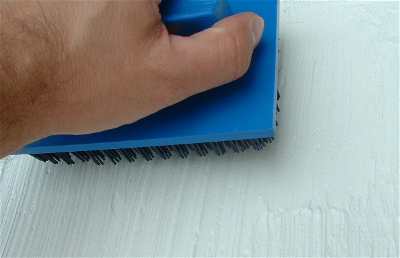
Using a stippling brush bounce it off the surface repeatedly making sure that brush is brought away cleanly and turning the brush slightly between each bounce, this should avoid any obvious lines. This is probably the easiest of patterns.
You can make the stipple pattern as thick as you like by applying the Artex thicker.
- Make sure there are no obvious squares where you have joined each area together and try to blend them all in together. Overlapping areas can easily be blended whilst it is still wet.
- Work speedily but safely as Artex can go off very fast and make working it very difficult.