

How to build a stud partition wall
A partition wall is often useful for separating a large bedroom into a smaller bedroom and a bathroom or an en-suite bathroom. Building regulations stipulate that all bedrooms must have a window that opens onto the outside of the property, so you cannot simply divide a large bedroom into two smaller ones unless a window can be fitted onto an external wall! It is a good idea to ask your local building control office to see if permission is needed before starting any work.
Before building a stud partition wall you have to decide exactly where it is to go and whether or not a door opening is needed in the partition. 3" by 2" rough sawn timber is normally used although for a large partition you could use 4" by 2" timber. After deciding where the partition is to go cut a piece of timber or a couple of pieces of timber to reach from one wall to the other wall where the partition is to go and nail it to the floor, this is called the sole plate.
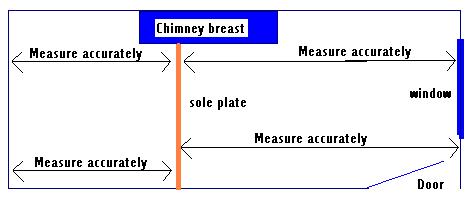
Using a length of straight timber and a spirit level mark a line down each side of the two walls by placing the timber vertically on the sole plate, draw a line up each side of the timber on both walls. Check which way the joists in the ceiling are running, if they run opposite to the partition you can now fasten a piece of timber along the ceiling (head plate) using screws as nails could damage the plaster on the ceiling, fasten the piece of wood so that it aligns exactly with the pencil lines that you have drawn on the walls. If the joists run the same direction as the partition you will have to fix noggins between the joists or move the partition so that the head plate is directly on a joint. Fasten a stud between the sole plate and head plate on each wall, If the walls are solid at each end of the partition secure with wall plugs and screws.
When measuring and cutting the studs ensure that they are a millimetre or two longer and then knock the stud into place with a hammer. This will ensure that the studs are tight and will make it easier to nail them into place and will also ensure that the structure is more solid.
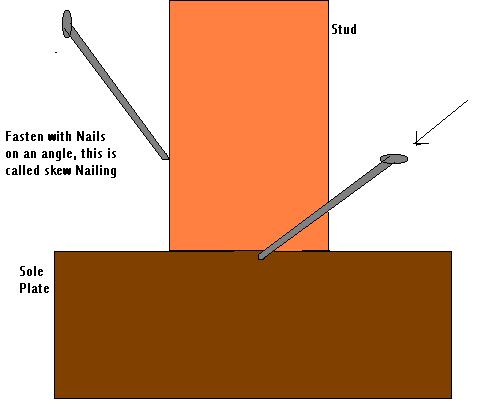
The stud partition can be fixed with nails or screws. Screws are normally stronger but Nails are much faster. Skew nailing or Skew screwing is the easiest way to attach the studs / noggins. Wood glue can also be used in addition to the nails or screws for even more strength.
Now the spacing between the studs needs to be worked out before the studs are nailed into position. There are several different opinions on the subject of stud spacing, some people set the studs at 400mm or 450mm and some set the studs at 600mm. Before you decide on your stud spacing you need to decide which size plasterboard you will be attaching to the studs afterwards. Thicker plasterboard is preferred rather than thin plasterboard and so a minimum of 12.5mm thick plasterboard is recommended. The spacing of the studs is dependent on which size of plasterboard you will be using and whether you will be positioning them horizontally or vertically.
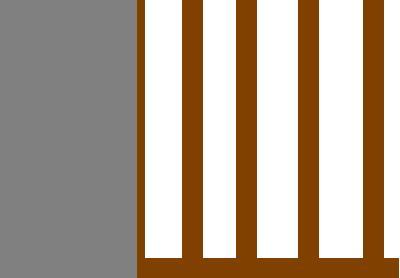
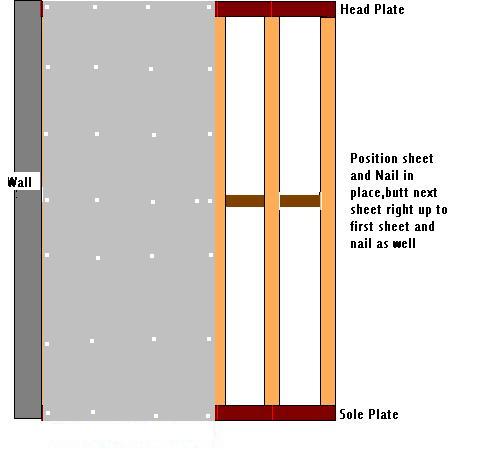
Boards fitted vertically
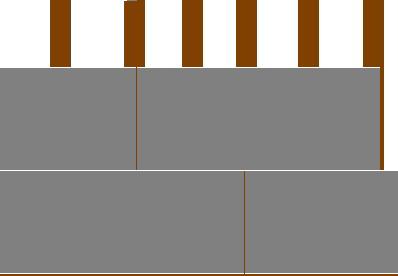
Boards fitted Horizontally (note how the joints are staggered)
As most houses have low ceilings we are going to use 1200mm * 2400mm sheets of plasterboard and fit them vertically, therefore for this demonstration we will be positioning the joist centres at 400mm.
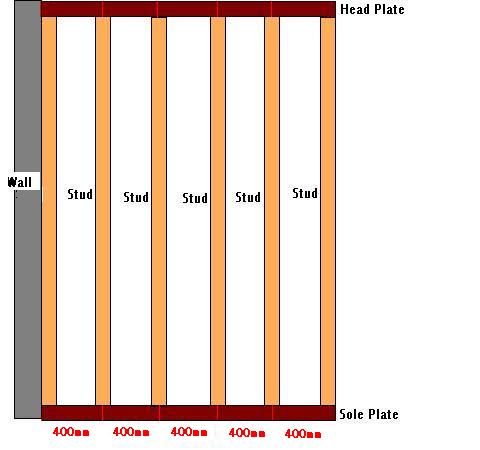
Ensure That the first stud is placed tight to the wall, measure the first 400mm from the wall then each other 400mm from the centre of the next stud. When all studs are secured in place fix noggins in between each stud in the middle of the studs, if you are to fix a sink to the wall later ensure a noggin is placed there also.
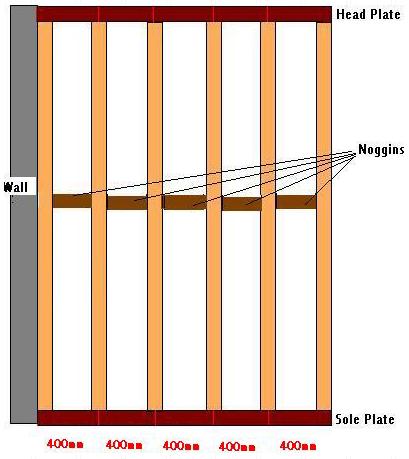
The noggins can be fixed in a straight line like this (which makes fixing them difficult)
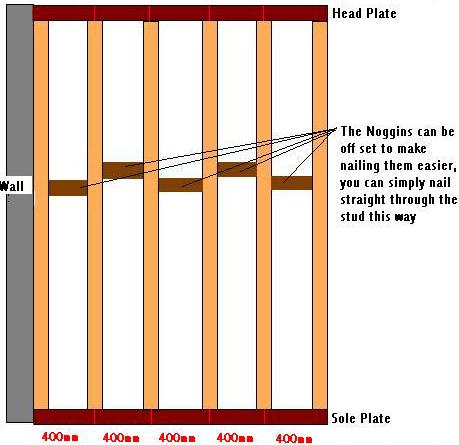
Or the noggins can be offset to make fixing them easier
It is now a good idea to mark the floor where all the centres are marked, this is so you know where to nail when you position the plaster board in place, make sure you use suitable rust proof nails with a large flat head or use bugle headed plaster board screws for fastening the plasterboard to the position.
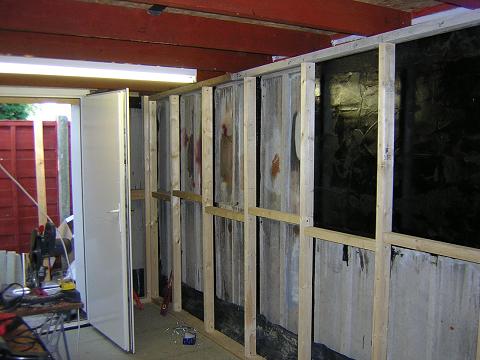
Here is a good example of a stud partition wall. You can see that the noggins have been staggered to make them easier to fasten into position
Doors can be easily be built into the partition by leaving a opening with studs on each side of the gap, fit the door casing directly to the studs.
After fastening the plasterboard on one side it is a good idea to place insulation between the sheets to provide sound proofing and better energy efficiency, then fasten the other side on.