

It is possible to have many bends in a tube in multiple directions, and the technique is exactly as described in the simple pipe bending section, but there are two considerations to take account of:
- Distance between bends – you need to measure carefully the lengths between bends and account for the curvature of the bend (approximately 7cm) in your measurements
- Direction of multiple bends – it is very easy to reverse a required bend as when using the pipe benders, usually you will be bending pipe away from you and the usual thought process expects things to come towards you. The best thing to do is to get the pipe positioned the way you think it needs to go, pull the arm over so the pipe is under tension and cannot shift and then double check everything will be in the right direction!
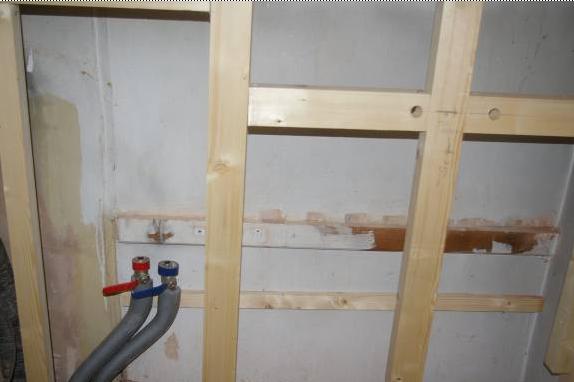
In this case, we need to connect up two pieces of pipe work from the lever ball valves lower left and have them protrude through the holes in the stud work top right ready for some wall mounted taps. As the majority of the pipe work will be covered by Aquapanel™ and then tiling, we want to eliminate joins as much as possible, so we will try and have a single piece of pipe from valve to outlet. As can be seen, this will involve a 90 degree bend straight from the valve to run horizontal along the batten, then 90 degree up directly behind the hole, and then another 90 degree bend to come out horizontal through the hole.
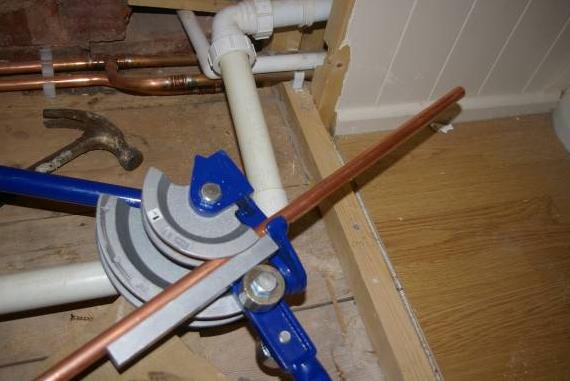
Step 1 – Insert the pipe and check the first straight length
Step 2 – Bend the pipe!
For detailed instructions on using a pipe bender please click here- Bend pipes with a pipe bender

Step 3 – Checking the distance between the point where the tube ‘enters’ the pipe bender channel (pencil mark) and where the pipe is now at 90 degrees. Distance is 7cm – remember to take account of that in your measurements, otherwise you will be either 7cm short for the next bend or 7cm too long.
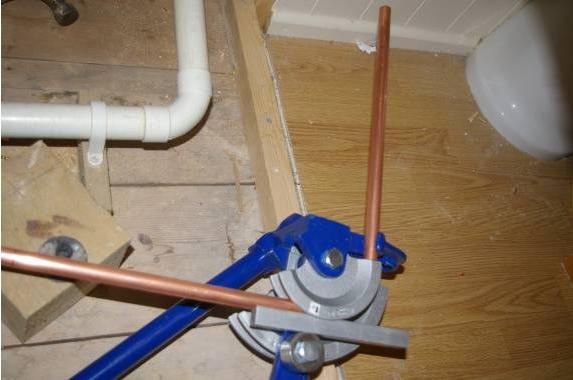
Step 4 – Preparing the right position for the next bend. The pipe is now under tension (note the right arm drawn forwards slightly). When the bend is carried out, it will be away from you – now is the time to double-check you have the pipe positioned right! If the pipe is visualized in position, the top (bent) part of this pipe is the horizontal length coming out of the wall and going to the tap, the next section between bend and pipe benders is the vertical section that will go against the wall and the section on the other side of the pipe benders will be the horizontal section flush against the batten on the wall.
Step 5 – Pipe is bent.

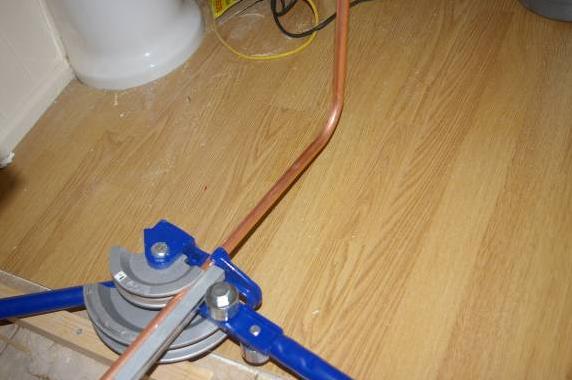
Step 6 – Checking the measurements, we see a distance of 38cm. This is the distance between the hole for the tap and the position of the pipe on the batten – to get this correct on the pipe, it as necessary to take account of both angles and position the pipe in the pipe benders appropriately.
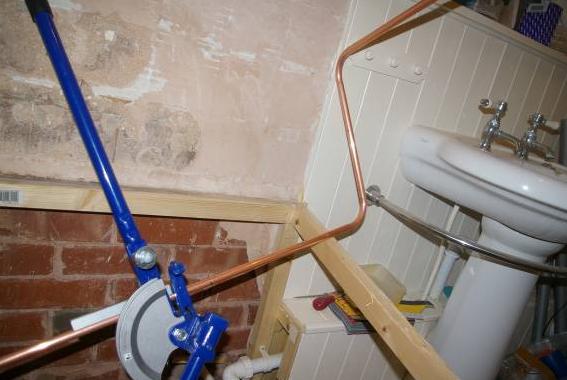
Step 7 – the final bend This bend is to take the pipe from the horizontal batten down to the ball valve.

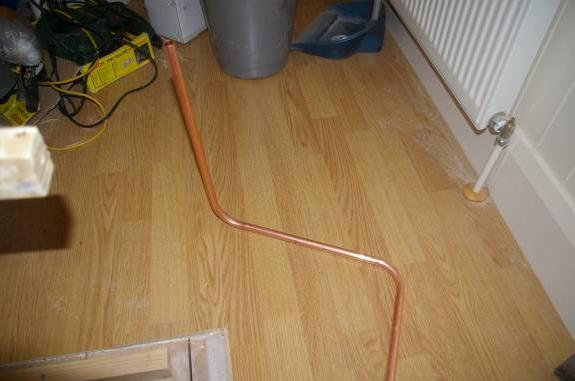
Pipe in place.
Unfortunately, I didn’t take a picture of the pipe work before I fitted the Aquapanel™ to the studs, so you will have to imagine a single piece of tube from valve to tap! In this case, I did have to carry out some remedial work – the cold (RHS) ball valve was too close to the bend (as mentioned previously, the pipe is very slightly distorted for a centimetre or so after a bend) so there was not room to have the compression fitting nut and olive slid up the pipe, so I had to lower the valve by about 8mm. If you find any of the distances is out, then you could either rework the bends on a fresh tube, or simply cut the pipe and use a coupler (assuming length was too long!) depending on your preference. It takes practice to get the measurements and angles correct on multiple bends, so it is worth practicing on old pieces of pipe before “going live”.