

Before tiling a wall you must ensure that it is free from any previously applied tile adhesive or wall paper!
It is much easier to tile a straight wall than a wall that is out of level or full of holes and so preparation is the key. If you find the plaster on the wall is loose it may be best to remove it completely and board the wall with new plasterboard or tile backer board before you even try to tile it. This article only covers tiling a wall, cutting tiles and which adhesive to use etc. can be found in the tiling section. You need to work out at which height you are going to start tiling and fix a level batten to the wall at this level, or you can use a tile tracker. In this demonstration we will be using sure tile spacers as these are far superior to normal tile spacers and make tiling much easier.
If you intend using natural stone on the walls then Weight is an issue that is often overlooked, these are guides and assume everything is well made an fitting to comply with Building regulations.
Technical specifications for the weight limit of Natural stone on certain substrates |
| SUBSTRATE | WEIGHT LIMIT | APPROXIMATE WEIGHT |
| A skim plastered solid wall or plasterboard with a skim coat | 20Kg per Sq/Metre | approximate weight of 10mm thick stone |
| Plasterboard without a plaster skim or sand cement render | 32kg per Sq/Metre | approximate weight of 15mm thick stone |
| Correctly braced Aquapanel | 50Kg per Sq/Metre | approximate weight of 20mm thick stone |
A common question is "is it possible to tile over paint"
The answer is " stick a piece of carpet tape onto the paint and leave it 20 minutes, if when you remove it some paint comes with the tape then the paint needs removing first by a mechanical means ( not a chemical stripper)" You can tile over tiles as well but it is often better to remove the old ones first Before you start to tile a wall it is a good idea to read the page on setting out.

Loose plaster like this needs removing before you attempt to tile on the wall. Once removed you can either re-plaster the wall or dry-line the wall. If you are tiling in a wet area you should use tile backer board or a moisture resistant plasterboard.
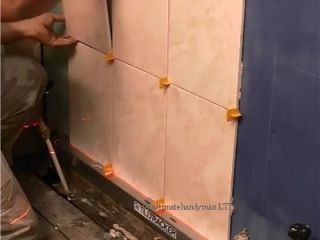
Here we have used a laser level to give us a straight line where we want to start tiling. We have then set the tile tracker to this line and will tile up from it. If you do not have a tile tracker you can use a straight piece of timber and fix it to the wall.
The wall has been marked where the first tile needs to be, for more information on this please see here-
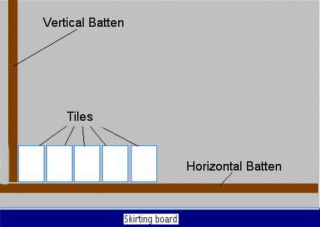
If you are not using sure tile spacers it is a good idea to fix a vertical batten to the wall to ensure that the tiles are fixed correctly. Fasten a horizontal batten on the wall and then fix one Vertically, use a spirit level to ensure that both battens are completely level, the Vertical batten should be positioned so that the first tile you position will be in the centre of the wall.
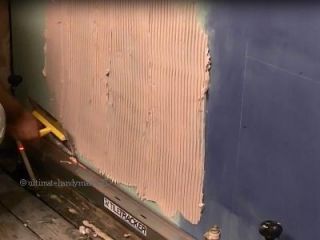
Spread the adhesive onto the wall and then notch the adhesive using a notched trowel. Do not apply too much adhesive at once, you only need enough to cover about 1 square metre. Never Dab adhesive on each corner as this can cause the tiles to break. Here we are using a notched trowel as the tiles are ceramic.
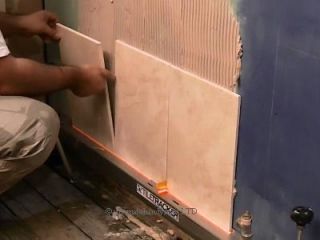
You can now proceed to fix the tiles, press them into position using a slight twisting motion. Ensure spacers are used at this point to give the correct gap between the tiles. Work outwards and upwards ensuring you leave a 4mm - 6mm expansion gap at all edges for expansion. This will be sealed later using silicone sealant When you get to the corner or to the ceiling you will need to scribe cut tiles
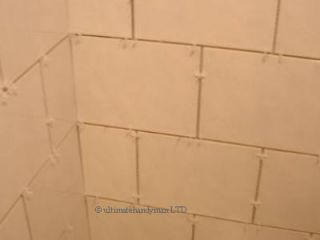
If you are using traditional tile spacers ensure you use them like in this picture
Continue tiling upwards and outwards ensuring all tiles are firmly fixed and all tile spacers are in position. Leave the adhesive to set fully then remove the tile spacers, you can then grout the tiles-