Bathroom Plastic Cladding & ceiling Lights
Moderator: Moderators
-
leeutalkin2me
- Newly registered Member
- Posts: 57
- Joined: Sun Jul 27, 2008 8:53 am
- Has thanked: 0
- Been thanked: 2 times
Bathroom Plastic Cladding & ceiling Lights
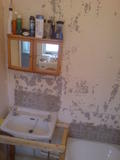
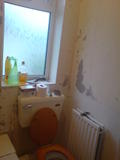
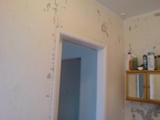
Im re doing my bathroom.
Getting new bathroom suite put in. Its very small and a shower put over the Bath with Screen.
I am gonna put the plastic cladding all around the bath and most likely the entire room.
Am not sure in what order things have to be done.
I think the plumber will have to come and remove my old stuff, leave marks where pipes will be coming from, as the cladding will be going over the top and need holes cut out.
Then the cladding fitted, for the plumber to return and fit the suite.
Is this right, as it will mean being done on seaparate days.
Is the cladding easy to fit and cut accordingly.
Especially as i want to put the Cladding on the Ceiling and unsure about the the lighting bit.
does the cladding and the ceiling have to have holes cut out already before the lights are put on. or can cladding be fitted, then the slots cut out when in place. for the lights to be added.
Im not sure what lighting would be best. one main in centre of room like this
http://www.diy.com/diy/jsp/bq/nav/sk...?skuId=9271217
or spotlights all over the ceiling.
http://www.diy.com/diy/jsp/bq/nav/sk...?skuId=9673464
or even those lights that are on a Rail, which can point in various directions around the room.
Can anyone advise me who been in this boat. or even show some pics of what looks like for them ;-)
My bathroom is very small indeed so cladding shouldnt be too expensive.
16sq meters for whole room if my numbers correct., or just bath area 8.7metres.
I was swaying towards towards the big one light in the room to be easier. at present the light there is off centre, moving towards the window.
If i do cladding on the ceiling, do i have the cladding put up, without having to drillcut pieces out of it for the light, can it be done afterwards as surely u wud need cuts made in the ceiling as well as the cladding.i really have no idea and wondered if electrician cut into ceiling cladding, that it would split
- ultimatehandyman
- Site Admin
- Posts: 24425
- Joined: Sat Jul 16, 2005 7:06 pm
- Location: Darwen, Lancashire
- Has thanked: 1012 times
- Been thanked: 918 times
Hi and welcome,
I have not fitted the wall cladding before, but I have fitted the ceiling stuff, which I guess will be similar.
For the light fitting see here-
http://www.ultimatehandyman.co.uk/diy/cladding/
http://www.ultimatehandyman.co.uk/how_t ... lights.htm
I have not fitted the wall cladding before, but I have fitted the ceiling stuff, which I guess will be similar.
For the light fitting see here-
http://www.ultimatehandyman.co.uk/diy/cladding/
http://www.ultimatehandyman.co.uk/how_t ... lights.htm
-
leeutalkin2me
- Newly registered Member
- Posts: 57
- Joined: Sun Jul 27, 2008 8:53 am
- Has thanked: 0
- Been thanked: 2 times
thanks for the links.
so the ceiling cladding cant just be glued onto the current ceiling, you have to put wood up and attach it to the wood?
and if ur having new ceiling light. holes in ceiling and the cladding need to be done before cladding is put up or can u do the holes after cladding is up, using one of them round cutting things on the drill that isaw.
- ultimatehandyman
- Site Admin
- Posts: 24425
- Joined: Sat Jul 16, 2005 7:06 pm
- Location: Darwen, Lancashire
- Has thanked: 1012 times
- Been thanked: 918 times
It depends what you are using. The stuff I used required a frame to be built and was fastened with special clips, it was made by Parador.leeutalkin2me wrote:thanks for the links.
so the ceiling cladding cant just be glued onto the current ceiling, you have to put wood up and attach it to the wood?
and if ur having new ceiling light. holes in ceiling and the cladding need to be done before cladding is put up or can u do the holes after cladding is up, using one of them round cutting things on the drill that isaw.
You can clad the ceiling and then drill right through from underneath using hole saws if you like, but you have to avoid the battens and the joists above or else it will make fixing the downlights very difficult.
-
leeutalkin2me
- Newly registered Member
- Posts: 57
- Joined: Sun Jul 27, 2008 8:53 am
- Has thanked: 0
- Been thanked: 2 times
its this sort of thing
http://www.taplastics.co.uk/Classic.htm
http://www.decorcladding.co.uk/acatalog ... lings.html
http://www.taplastics.co.uk/Classic.htm
http://www.decorcladding.co.uk/acatalog ... lings.html
- ultimatehandyman
- Site Admin
- Posts: 24425
- Joined: Sat Jul 16, 2005 7:06 pm
- Location: Darwen, Lancashire
- Has thanked: 1012 times
- Been thanked: 918 times
I am not familiar with their products, but there is a contact link on the first website, you can ask them how they recommend their products to be fastenedleeutalkin2me wrote:its this sort of thing
http://www.taplastics.co.uk/Classic.htm
http://www.decorcladding.co.uk/acatalog ... lings.html
They will probably have a brochure that they can send to you that shows how to install it.
- Jaeger_S2k
- Pro Handyman
- Posts: 3423
- Joined: Sun Nov 19, 2006 4:31 pm
- Location: North West, England, United Kingdom
- Has thanked: 20 times
- Been thanked: 27 times
Used that stuff in a shower enclosure at one of the flats.
It's such an easy fit. Would still recommend you baton out the ceiling with maybe 2 x 1 at no more than 400mm centres but 200mm would be better.
Place the 2 x 1 with the 2" flat on the ceiling. The problem you could have is the plastic would follow any curvature you have in the existing and as it's shiny it will be glaringly obvious.
Level as UHM has done with shims/packers and then you can glue and pin the panels up. Take some time to work out your room plan and the direction of the panels as they come in fixed lengths that are best not joined. So you want to have minimal waste.
Tip for around the shower, but I'd use it every where in a bathroom to stop any moisture ingress, once the first panel is in place and fixed (pinned/glued) run a slither (a fine bead) of silicone sealant (get something good with a mould retardant like Dow Cowning) down the grove of the fixed panel and then present and press the tongue of the next panel into it. Any excess that weeps out can be wiped off with some Big Industrial wipes. That way you'll guarantee the panels are water sound along each length.
There's little weight in them but they are also very flexible so if you can board out the shower enclosure to give rigidity or bring any batons closer to say 200mm centres.
You'll need your shower first fixed by the plumber, he'll just leave you the tails to fix into the shower mixer. You'll need to fit the panels and cut 2 holes for though. Your method of fixing and batons need to be known to him to allow for the correct length of tails. It's not as difficult as it sounds.
He'll also fit the bath for you to panel down to the edge then you'll have a nice clean seal to silicone to.
Lighting, I'd recommend down lights for the bathroom and an enclosed fitting for above the shower, you'll also want to fit an extractor to help remove the stream and reduce condensation (batoning the ceiling will also help). The plastic cladding cuts really easily and you could cut through both cladding and ceiling if needed but I'd recommend having the light holes in the ceiling placed before cladding up. If you have a loft space above the bathroom, then you can, once the cladding is in place, go up to the loft and drill down through the holes in the loft. When drilling the pastic, take it slowly and without too much pressure it's only plastic!
Any thing else just ask.
Jaeger.
Senior Member doesn't mean I'm OLD!
Senior Member doesn't mean I'm OLD!
- Hoovie
- Borders Bodger
- Posts: 8168
- Joined: Fri Jul 27, 2007 6:06 pm
- Location: Scottish Borders & East Devon
- Has thanked: 0
- Been thanked: 4 times
I did ceiling cladding fairly recently (pine T&G rather then plastic) and pretty much did it as Jeager described re the packing out and battoning, plus making the holes in ceiling first.Jaeger_S2k wrote:Used that stuff in a shower enclosure at one of the flats.
It's such an easy fit. Would still recommend you baton out the ceiling with maybe 2 x 1 at no more than 400mm centres but 200mm would be better.
Place the 2 x 1 with the 2" flat on the ceiling. The problem you could have is the plastic would follow any curvature you have in the existing and as it's shiny it will be glaringly obvious.
Level as UHM has done with shims/packers and then you can glue and pin the panels up. Take some time to work out your room plan and the direction of the panels as they come in fixed lengths that are best not joined. So you want to have minimal waste.
Tip for around the shower, but I'd use it every where in a bathroom to stop any moisture ingress, once the first panel is in place and fixed (pinned/glued) run a slither (a fine bead) of silicone sealant (get something good with a mould retardant like Dow Cowning) down the grove of the fixed panel and then present and press the tongue of the next panel into it. Any excess that weeps out can be wiped off with some Big Industrial wipes. That way you'll guarantee the panels are water sound along each length.
There's little weight in them but they are also very flexible so if you can board out the shower enclosure to give rigidity or bring any batons closer to say 200mm centres.
You'll need your shower first fixed by the plumber, he'll just leave you the tails to fix into the shower mixer. You'll need to fit the panels and cut 2 holes for though. Your method of fixing and batons need to be known to him to allow for the correct length of tails. It's not as difficult as it sounds.
He'll also fit the bath for you to panel down to the edge then you'll have a nice clean seal to silicone to.
Lighting, I'd recommend down lights for the bathroom and an enclosed fitting for above the shower, you'll also want to fit an extractor to help remove the stream and reduce condensation (batoning the ceiling will also help). The plastic cladding cuts really easily and you could cut through both cladding and ceiling if needed but I'd recommend having the light holes in the ceiling placed before cladding up. If you have a loft space above the bathroom, then you can, once the cladding is in place, go up to the loft and drill down through the holes in the loft. When drilling the pastic, take it slowly and without too much pressure it's only plastic!
Any thing else just ask.
Definately get the right size hole saw - They are cheap and trying to make the hole by instead drilling lots of little holes and using a pad saw or knife to join them up is false economy.
UHM mentioned about the special clips - although they are designed for one specific type of cladding, they will work on others (I used them for standard Pine T&G cladding on both wall and ceiling) and and very quick and easy to use.
I can confirm from personal experience the advice you've been given by them is a really good plan to follow
I went to a bookstore and asked the saleswoman, "Where's the self-help section?"
She said if she told me, it would defeat the purpose.
She said if she told me, it would defeat the purpose.
-
leeutalkin2me
- Newly registered Member
- Posts: 57
- Joined: Sun Jul 27, 2008 8:53 am
- Has thanked: 0
- Been thanked: 2 times


