

If you have a flat roof on a part of your property they often are susceptible to problems and so it is now common practice to convert a flat roof into a pitched roof. This guide has been submitted by one of the sites members and so it should help to understand what is involved.
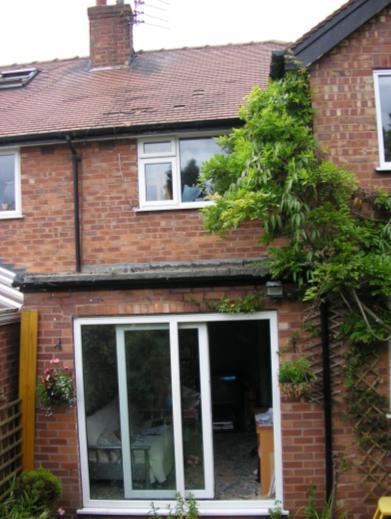
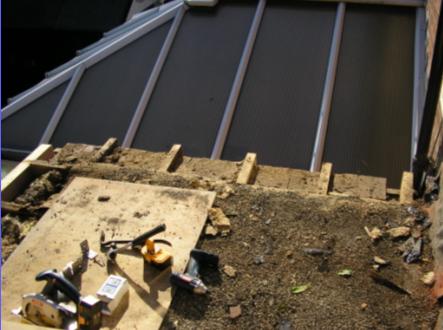
This shows the Existing extension fitted with a flat roof which was probably in excess of 20 years old.
Minor repairs had been made over the last 3 or 4 years to repair rotten chipboard. In the end, most of the front view of the roof had rotted away which resembled the bottom of a rabbit’s cage!
Rainwater was ultimately seeping into the living space below.
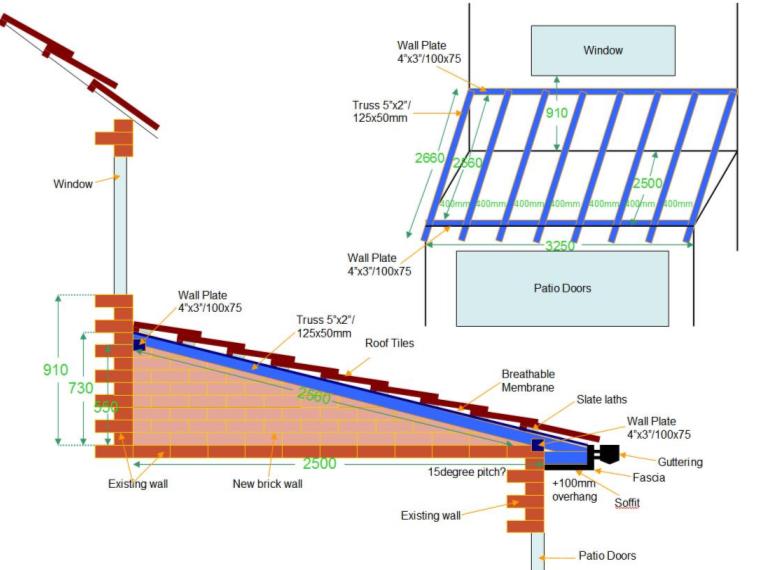
This is the intended design with measurements and materials used-
The First task was to remove the existing guttering and fascia boards with a wrecking bar. As the roof area was rotting away care must be taken on where you tread – it is safer to step on the area where the existing joists are.
Rear Wall Plate
Calculate the required height for the wall plate based on what is to sit on top of it i.e truss (minus birdsmouth cuts), laths and tiles. Also allowing for cutting in the lead flashing at one brick below the window sill.
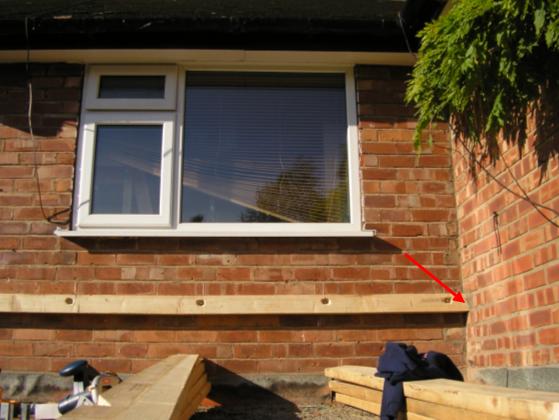
A half brick on the side wall was knocked out (red arrow) to allow the wall plate to be pushed through giving it extra support. This was then re-pointed once the wall plate was in position. Marks were chalked on the wall for the spacing for bolts, making sure the holes in the brick would be in the centre of the brick.
These marks were transferred to the wall plate. Holes were drilled through the wall plate including counter sinking to allow for extra washers and access with a spanner/socket set. Offered up wall plate against wall and marked hole positions on the wall. Drilled holes to the exact depth of the barrel of the bolt. Placed bolt into holes and positioned the wall plate into knocked out hole on the side wall and manoeuvred the wall plate against the wall so that the shaft of the bolts that are in the wall went through the holes in the wall plate. Added oversized washers and tightened up the bolt making sure that the wall plate was completely level.
Front Wall Plate
Remove existing felt and roofing board to reveal the existing joists. Cut back the joist to allow fixing of front wall plate so that the front wall plate fits flush with the external front wall. This wall plate will sit on the first skin brick work. Line up wall plate against existing joists and make a mark on the wall plate in line with the centre of the joists. Drill holes at these marks to allow a 6” nail to be driven through the wall plate into the joists.
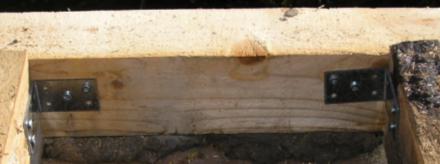
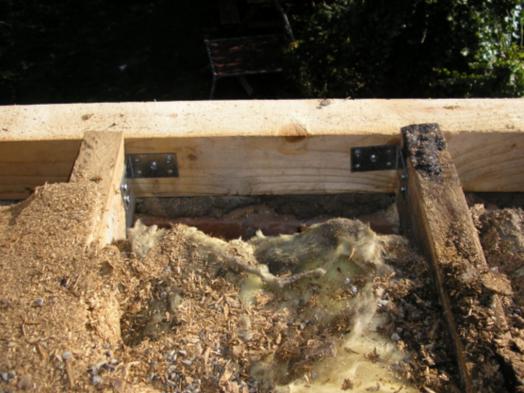
Lay a thick layer of cement on existing brick work then place the wall plate on this and get a good level. Using drilled holes sink 6” nails though wall plate into joists. This was also secured with ‘L’ brackets on each rafter.
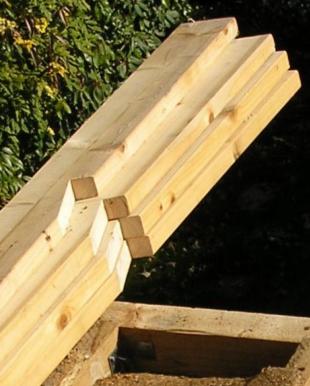
Rafters
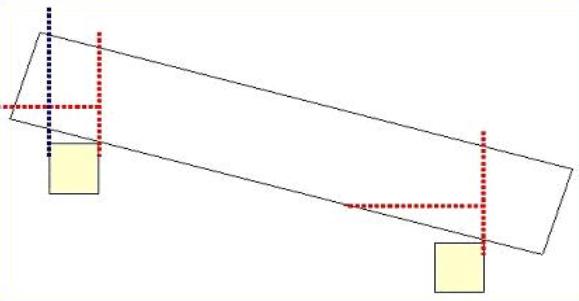
Once the two wall plates are in place work can begin on installing the rafters. Firstly, each rafter should be placed on the front and rear wall plates making sure it is pushed up tight against the rear wall. Mark a vertical line, parallel with the wall (in blue) on the rafter and then cut along this line. This will then allow the rafter to sit flush against the rear wall.
Once the rafter end is cut then birdsmouths can be cut into the rafter to allow it to sit securely onto the wall plates. To do this put the rafter back onto the front and rear wall plates and flush up to the rear wall. For the birdsmouth on the rear wall draw a vertical line (in Red) on the rafter using the front of the wall plate as a guide.
Then draw a horizontal line 90° to the vertical line from the vertical line to the wall. The height of this line must not be too high up as to weaken the point where the rafter sits on the wall plate and must be the same on both cuts on the rafter. Use a suitably thick piece of wood to provide a template (I used an off cut from rafter).
Repeat this process for the front birdsmouth but use the outside face of the wall plate as the guide for the vertical line then draw a horizontal line from this line inwards at the same height as the horizontal line for the previous cut.
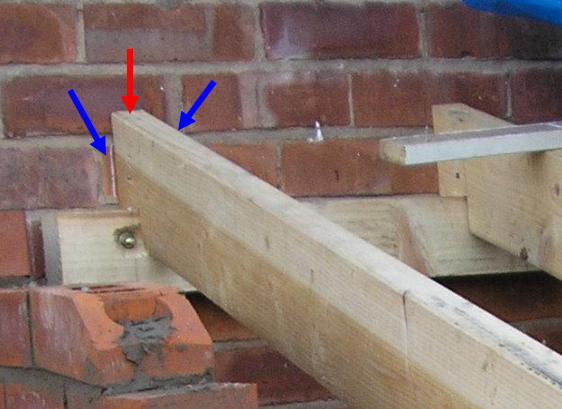
Put the rafters into position and then drill a hole through the top of the rafter in line with the middle of the wall plate (see red arrow above). Then knock a 6” nail down through the hole and securely into the wall plate. Also sidespike 4” ovals into either side of the rafter, again into the top of the wall plate (blue arrow above). This process needs repeating at both ends of the rafter.
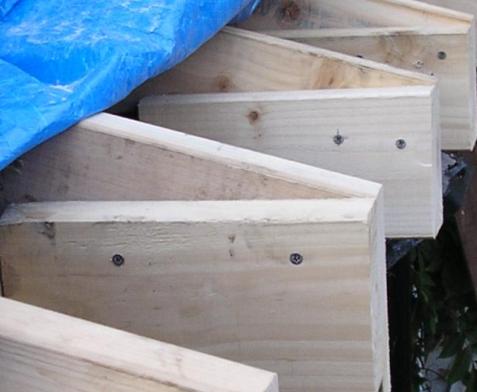
The ends of the rafters were to be cut slightly longer (based on the width of the soffit) to provide an over hang. A return was used to provide a fixing point for the soffit. These returns were screwed to the inside of the overhanging rafter so that the return formed a right angle to the brick wall.
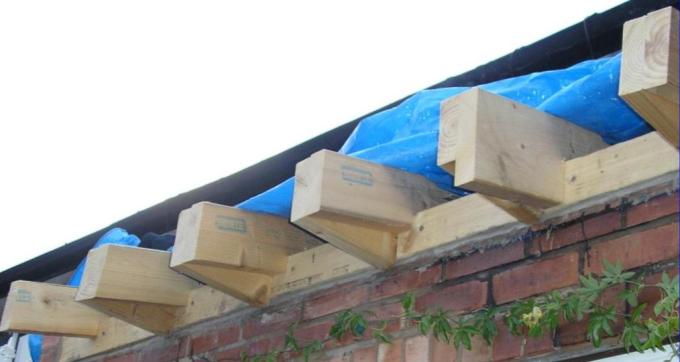
A plumb line was stretched from the first rafter to the last at the point where the rafter and return were to be cut. By dropping the plumb line down the side of the rafter/return a line could be drawn to produce a vertical cut. Once this was done on each rafter both the rafter and return was cut to square off the ends.