- Ultimate Handyman Forum Index DIY Forum/Home improvement Metalworking Forum
- Search
-
- It is currently Tue Apr 22, 2025 7:43 pm
- All times are UTC
Cutting a brass cylinder
Metalworking questions in this section please
Moderator: Moderators
-
vampireuk
- Newly registered Member
- Posts: 7
- Joined: Wed Sep 16, 2009 2:55 pm
- Has thanked: 0
- Been thanked: 0
Cutting a brass cylinder
Afternoon all, I'm currently facing a bit of an issue. I have a brass cylinder, a now empty and fired casing that I'm converting into a money jar for a bit of something to do. I've marked up on a practice section from another casing. At the front of the casing I have marked a line at 45mm inwards and marked this point going 90 degrees to each side of the casing. At the top of each 90 point I intend to cut down diagonally through the brass to create a slope where I will braze another brass plate onto this angle and another brass plate along the top half of the case that is remaining flat. What are my options for making as clean a cut as possible without risking having the angle of the cut off and having to start filing down everywhere to make the cover plate fit snugly?
vampireuk
-
ultimatehandyman

- Site Admin
- Posts: 24426
- Joined: Sat Jul 16, 2005 7:06 pm
- Location: Darwen, Lancashire
- Has thanked: 1012 times
- Been thanked: 918 times
Post by ultimatehandyman »
You could cut it flush on a metal cutting bandsaw.
Or you could use a hacksaw if you make something to guide the blade and stop it from wandering.
I'd probably cut just above the line though and file it afterwards as I have made quite a few bits using this teqhnique-
screw-clip-bevel-gauge-tap-wrench-and-h ... 10067.html
g-clamp-t10283.html
Or you could use a hacksaw if you make something to guide the blade and stop it from wandering.
I'd probably cut just above the line though and file it afterwards as I have made quite a few bits using this teqhnique-
screw-clip-bevel-gauge-tap-wrench-and-h ... 10067.html
g-clamp-t10283.html
ultimatehandyman
vampireuk
-
ultimatehandyman
- Site Admin
- Posts: 24426
- Joined: Sat Jul 16, 2005 7:06 pm
- Location: Darwen, Lancashire
- Has thanked: 1012 times
- Been thanked: 918 times
Post by ultimatehandyman »
If you cut it just above the cut line and then file it down it should be fairly easy as brass is pretty soft. When you get really close to the line you can draw file it, which should make it easier to get a dead flat line ready for the braising.
I had a friend who had some world war two shell and bullet cartridges that were made into hats and they were brilliant.
I'd love to see a pic of the finished item if possible
I had a friend who had some world war two shell and bullet cartridges that were made into hats and they were brilliant.
I'd love to see a pic of the finished item if possible
ultimatehandyman
-
Hitch
- Senior Member
- Posts: 6055
- Joined: Mon Jan 16, 2006 8:16 pm
- Location: Somerset
- Has thanked: 77 times
- Been thanked: 335 times
A tricky one, easy with something like a bandsaw.
If it was me, id go with a 5" grinder and thin cutting disc. With care they can be very accurate.
If not, if the line is marked accuratley, hacksaw then file back.
Rotate it round, quarter of a turn at a time, cutting bit by bit. Possibly cutting through the sides first, then the top and lower sections.
The brazing will cover any slight miss alignment. I gather its going to be polished back afterwards?
[size=100][color=green][b]Why isn't the number 11 pronounced onety one? [/b][/color][/size]
Hitch
-
Hitch
- Senior Member
- Posts: 6055
- Joined: Mon Jan 16, 2006 8:16 pm
- Location: Somerset
- Has thanked: 77 times
- Been thanked: 335 times
I forgot to add, easy way to check, mark it up, then offer it into a bowl of water at the required angle. The water will give you a flat palne across any shape. ;)
Other way is to set it up in a fixed position, then use a pen/scriber mounted on a block to mark the plane.
Other way is to set it up in a fixed position, then use a pen/scriber mounted on a block to mark the plane.
[size=100][color=green][b]Why isn't the number 11 pronounced onety one? [/b][/color][/size]
Hitch
vampireuk
-
big-all

- Pro Carpenter
- Posts: 23658
- Joined: Sat Dec 16, 2006 10:11 pm
- Location: redhill surrey an auld reekie laddie
- Has thanked: 740 times
- Been thanked: 2356 times
big-all
-
vampireuk
- Newly registered Member
- Posts: 7
- Joined: Wed Sep 16, 2009 2:55 pm
- Has thanked: 0
- Been thanked: 0
I managed to borrow a bandsaw from a nearby workshop in exchange for another casing for them to turn into one. 
Now another fun one, I'm looking at attaching a capbadge to the thing.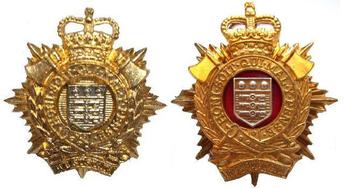
The badge itself is about an inch tall and is quite flat on the back, is there a way of making the item bend to fit the curve of the cylinder or is this one just wishful thinking on my part?
Now another fun one, I'm looking at attaching a capbadge to the thing.
The badge itself is about an inch tall and is quite flat on the back, is there a way of making the item bend to fit the curve of the cylinder or is this one just wishful thinking on my part?
vampireuk
chris_h
vampireuk
-
vampireuk
- Newly registered Member
- Posts: 7
- Joined: Wed Sep 16, 2009 2:55 pm
- Has thanked: 0
- Been thanked: 0

This was a test piece of material that gives an example of what I was cutting.

Here is the base along with the fuse assembly which had to be hammered out using a drift, hard work I can tell you and I pretty much ruined this assembly. Luckily I had another spare which is a lot tidier.

Here is the fuse removed from the casing, it's been cut down just above the thread as a plug for the money box.

Oh eck, bit blurred this one, shows the cut that was made on the bandsaw in comparison to the original shape.

Starting to shine up nicely!
It's all coming together, tommorow I'm going to visit somebody on my travels and see about getting the top brazed.
vampireuk
-
ultimatehandyman
- Site Admin
- Posts: 24426
- Joined: Sat Jul 16, 2005 7:06 pm
- Location: Darwen, Lancashire
- Has thanked: 1012 times
- Been thanked: 918 times
Post by ultimatehandyman »
When I saw the second picture, I thought holy sh!t that has not been fired 
It's looking good so far though
It's looking good so far though
ultimatehandyman
-
Hitch
- Senior Member
- Posts: 6055
- Joined: Mon Jan 16, 2006 8:16 pm
- Location: Somerset
- Has thanked: 77 times
- Been thanked: 335 times
As its polished, they will need to use a very close matching filler rod to the original....sometimes its hard to know what the original is.
I did some brass the other day, TIG welded, using small strips of the original material offcuts as filler, that ensures a perfect colour match.
Normally a slight missmatch is unnoticable while brightly polished, but when it starts to tarnish the joint shows up more.
I did some brass the other day, TIG welded, using small strips of the original material offcuts as filler, that ensures a perfect colour match.
Normally a slight missmatch is unnoticable while brightly polished, but when it starts to tarnish the joint shows up more.
[size=100][color=green][b]Why isn't the number 11 pronounced onety one? [/b][/color][/size]
Hitch
-
vampireuk
- Newly registered Member
- Posts: 7
- Joined: Wed Sep 16, 2009 2:55 pm
- Has thanked: 0
- Been thanked: 0
as promised, a couple more.

Just back in from engraving, some song lyrics my friend wished to be engraved on there for her.

I cleaned the thing up a little bit since it had been sat around for a couple of weeks with no polishing going on.

The brass lid metal glued in place, I was originally going for a braze but was advised with the thickness of the brass for the lid it would distort quite badly. In this one the lid is at a bit of an angle so I removed it and put the damn thing back on.
I forgot to get any pictures of doing the lid itself, I had originally gone with 3mm thick brass but cutting the material with the tools in my workshop was far too difficult and a decent shape would not have been possible. Luckily I had a roll of much thinner material used for shims which was easily cut, I used some snips for the first attempt, but it didn't look up to standard, especially after I knocked it with a hammer a couple of times to try and remove a kink, so the next was cut with a good old dremel which did the trick nicely. It's not going to win any awards but for what it is I'm quite content with it.

And of course, the finished article. :)
Just back in from engraving, some song lyrics my friend wished to be engraved on there for her.
I cleaned the thing up a little bit since it had been sat around for a couple of weeks with no polishing going on.
The brass lid metal glued in place, I was originally going for a braze but was advised with the thickness of the brass for the lid it would distort quite badly. In this one the lid is at a bit of an angle so I removed it and put the damn thing back on.
I forgot to get any pictures of doing the lid itself, I had originally gone with 3mm thick brass but cutting the material with the tools in my workshop was far too difficult and a decent shape would not have been possible. Luckily I had a roll of much thinner material used for shims which was easily cut, I used some snips for the first attempt, but it didn't look up to standard, especially after I knocked it with a hammer a couple of times to try and remove a kink, so the next was cut with a good old dremel which did the trick nicely. It's not going to win any awards but for what it is I'm quite content with it.
And of course, the finished article. :)
vampireuk
Return to “Metalworking Forum”
Jump to
- Ultimate Handyman DIY forum
- ↳ Welcome to the Ultimate Handyman DIY Forum
- WELCOME
- ↳ WELCOME
- ↳ About the forums
- UltimateHandyman Discounts
- ↳ Ultimatehandyman Discounts
- ULTIMATE HANDYMAN COMPETITIONS
- ↳ UHM Forum competitions
- SHOW CASE- A place to show us your work
- ↳ Show Case Gallery
- ↳ Rogues Gallery
- TOOL FORUM
- ↳ Power Tool Reviews
- ↳ Bosch
- ↳ budget power tools
- ↳ Dewalt
- ↳ Festool
- ↳ Hikoki/Hitachi
- ↳ Makita
- ↳ Metabo
- ↳ Milwaukee
- ↳ Ryobi
- ↳ Tool Talk
- ↳ Bargain Tools
- ↳ Hand tool reviews
- ↳ Power Tool Manuals
- ↳ Bosch
- ↳ Dolmar
- ↳ ELEKTRA BECKUM
- ↳ Hitachi
- ↳ Husqvarna
- ↳ Jonsered
- ↳ Makita
- ↳ Stihl
- Other DIY
- ↳ Computers
- ↳ communications and broadband
- ↳ Gardeners World
- ↳ Money Saving
- ↳ Vehicle maintenance & Repair
- ↳ Energy Saving
- DIY Forum/Home improvement
- ↳ General DIY forum
- ↳ Acrylic Forum
- ↳ DIY Disasters
- ↳ Stoves
- ↳ Building Forum
- ↳ Carpentry/Joinery Forum
- ↳ Kitchen Fitting
- ↳ Damp Proofing and Remedial problems
- ↳ Electric Forum UK
- ↳ Lighting
- ↳ Alarm Manuals
- ↳ Painting & Decorating Forum
- ↳ Plastering Forum
- ↳ Plumbing Forum
- ↳ Central Heating & Boilers
- ↳ Boiler Manuals
- ↳ Alpha
- ↳ Ariston
- ↳ ATAG
- ↳ Atmos
- ↳ Baxi
- ↳ Biasi
- ↳ Broag
- ↳ Chaffoteux
- ↳ Ferroli
- ↳ Glow-worm
- ↳ Halstead
- ↳ Ideal
- ↳ Intergas
- ↳ Keston
- ↳ Myson
- ↳ Potterton
- ↳ Protherm
- ↳ Ravenheat
- ↳ Saunier Duval
- ↳ Sime
- ↳ Thorn
- ↳ Vaillant
- ↳ Viessmann
- ↳ Vokera
- ↳ warmflow
- ↳ Worcester Bosch
- ↳ Shower Manuals
- ↳ Tiling Forum
- ↳ Metalworking Forum
- General
- ↳ The Lounge
- ↳ The games corner
- ↳ The Grumpy corner
- ↳ The Sport corner
- ↳ The Cookery corner
- ↳ The Music Corner
- ↳ BUY - SELL - FREE